
Sending Invoices to Xero
JobFlow can automatically create draft invoices in Xero once your job is ready for billing. To ensure the invoice is generated correctly, a few conditions must be met inside the job.
Prepare Tasks for Billing
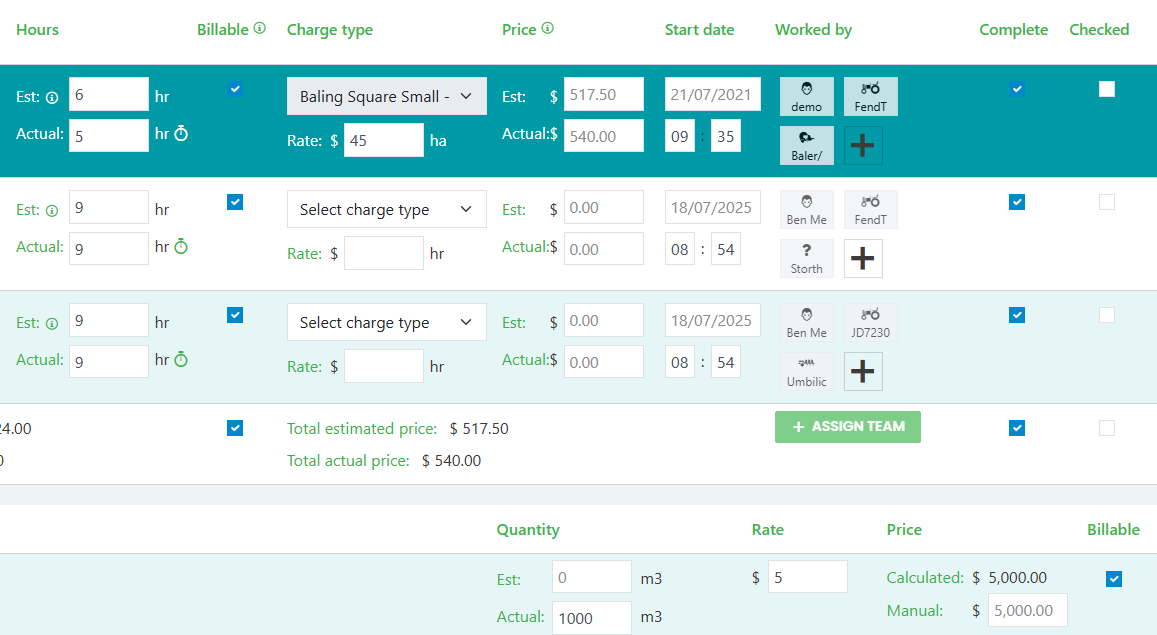
All tasks you want included on the Xero invoice must have:
- Completed checkbox ticked against the tasks
- Billed checkbox ticked against the services
Only tasks meeting both conditions will appear in the billing preview and be sent to Xero.
Review the Job
As you scroll down the job page, you will see all information relating to the completed work.
- Use the icons under each task title
- Enter any missing details into the text boxes that are not greyed out

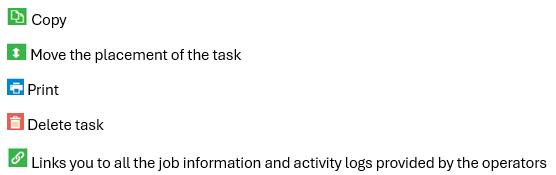
- Check that Tasks, Services, Materials, and Products are all captured for the job
- At the bottom of the job page, under Job Summary, double‑check all details.
- Use the dropdown box to change the format to Billing Preview to confirm:
- Quantities
- Chargeout rates
- Line descriptions
- Total amounts

Once everything looks correct:
- Change the Job Status at the top of the job to Invoice

- Click Save Job (bottom left)

Sending the Invoice to Xero
- When you save the job with the status set to Invoice:
- JobFlow sends the invoice to Xero
- The invoice appears as a Draft Invoice in Xero
Finalising the Invoice in Xero
- Once the draft invoice appears in Xero:
- Review the line items
- Add or adjust any Xero‑specific fields if needed
- Approve the invoice to send it to the customer