
Understanding the Dockets System
Within the JobFlow system, there are workflows that allow for planned work, with allocated tasks to operators, and unplanned work for tasks that pop up on the fly.
The main job creation and scheduling features work well for the admin or team leader who has received a call about a future job, put it into the system, and then allocated it to an operator when the time is right, however, this does not work for jobs that happen last minute.
Capturing unplanned work
Dockets allow an operator to create the bare bones of a task for unplanned work, which to them looks the same as a standard task on their app, however has no sensitive information. They can then start and complete a task as needed, to do so they are able to select the task type “ie: mowing, cartage etc” and move through the same workflow they are used to.
At a later date, an admin user will be able to see these dockets and either add this billable work on to an existing job, or create a totally new job from the information it contains.
Below will show you how to set up dockets from an admin side and then how they are able to be linked to a billable job. It will also show how this process looks from an operators’ perspective.
Getting Started Creating Docket Templates
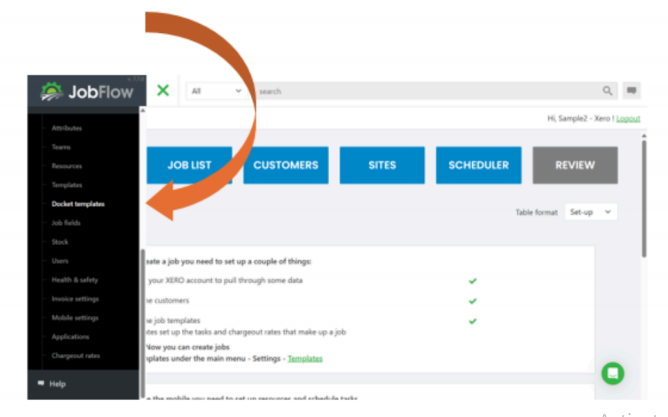
Step 1: Click on settings from the drop down menu, the select ‘Docket Templates’
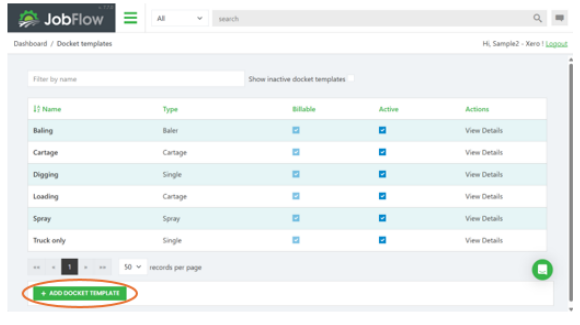
Step 2: This page allows you to create docket templates, select as active or not and click through to edit existing templates. Let’s create a new docket for a mowing task.
Step 3: Name the docket (we have called it Mowing Ryegrass) and allocate a ‘Type’. We are going to select ‘Single’ as the other types have in built widgets which are not relevant for a mowing task.
Then add a charge out rate, this should match the same charge out rate that you have lodged against that task type in a standard job template.
Finally, click save and this docket template will be viewable by your operators.

Using Dockets as an Operator
Step 1: Docket templates will be visible by the operator provided they have been created and saved correctly.
The operator will simply need to select the docket template type that is relevant to the type of work they are undertaking.
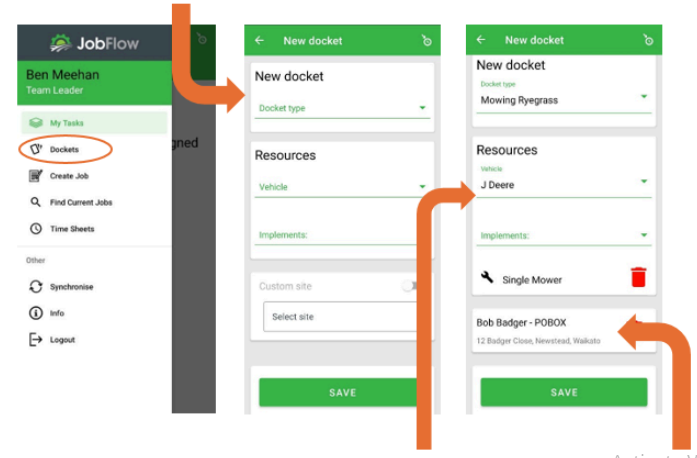
Step 2: The operator can add the relevant resources (implements and machinery) that they are using on that docket task to ensure the machinery is getting allocated and tracked as it should.
Step 3: The operator needs to add a site address that the work is happening at – this will give the administrator the information they need to ensure the work is getting billed to the correct customer. This can either be a specific customer site [Select custom site], or if the operator does not know site names, they can simply type in a RAPID # address to identify the location.
Step 4: Once saved, the docket will open up as a task – how the operators are used to seeing their work. From here they will be able to start and complete their tasks as per usual. This will record all their inputs and time against the task and site.
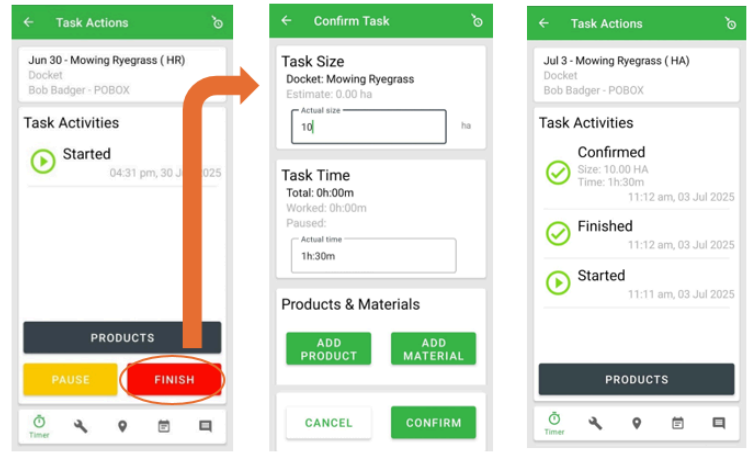
Once the unplanned job is completed, the operator can then return to the menu to start a new job, either from the task list or open another docket.
Converting a Docket into a Billable Job
Once the task is completed by the operator, the docket will be saved and stored within the JobFlow desktop system. It is from here that the task they have completed can be added to an existing job, ie: the operator does a mowing task that is then turned into a full billable baling job at a later date. The docket can also be added to a new job. This saves having job double ups with operators creating their own billable jobs alongside admin doing so.
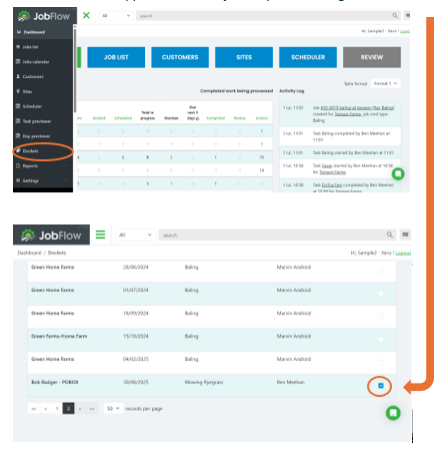
Step 1: Select dockets from the home menu and then select the docket that is applicable for the job they are wanting to bill.
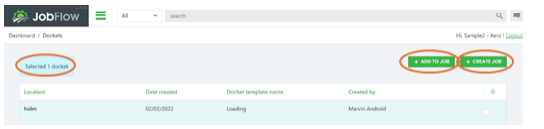
Step 2: Click either “ADD to JOB” or “CREATE JOB” and this will pull through the docket into a job. You can select multiple dockets, as many as is relatable to that billable job.
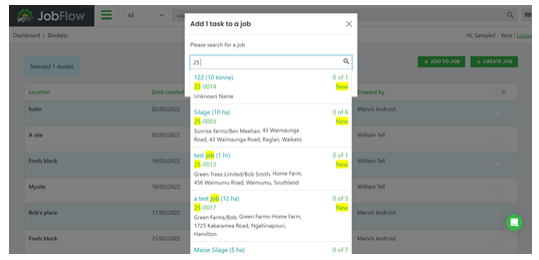
ADD TO JOB – this adds the docket(s)as a completed task(s) to an existing job that is set up.
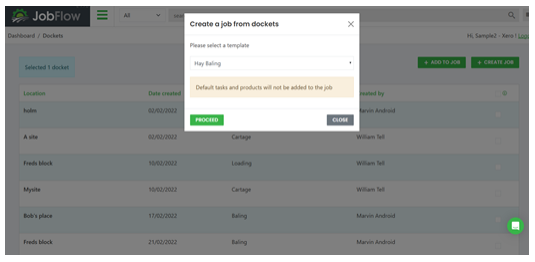
CREATE JOB – This creates a new job with the docket(s) selected as completed task(s) within that job.
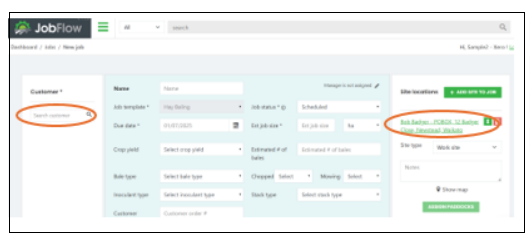
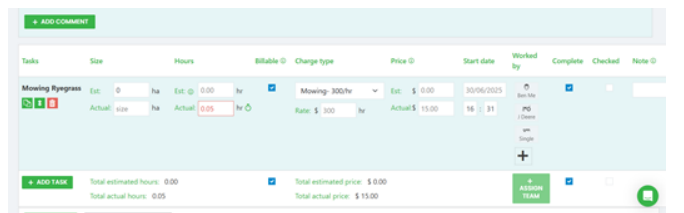
This will expand the task into a full billable job template as below. The customer portion will need to be added and the site location checked to make sure it lines up.
Step 3: Invoice the job as per usual.